Date: 2026.09.29 Click: 10
You hear a faint hum that rises and falls with your speed. That sound often points to a failing wheel bearing, and this guide shows you exactly how to confirm it. You will learn the symptoms, the causes, a full troubleshooting process, and the replacement steps for both bolt-on hub assemblies and pressed-in bearings. Follow each step in order, and you can diagnose the noise yourself and fix it in your own garage.
Key TakeawaysA simple left and right turn test can find the bad wheel bearing without any special tools.
If the hub moves more than 0.005 inches, you need to replace the bearing right away.
Hitting potholes and letting water get in cause most wheel bearing failures.
Always tighten wheel bearing bolts to the right torque to prevent early failure and repeat repairs.
You hear a faint hum as you drive. That sound changes with your speed. This is a clear sign of a bad wheel bearing. The noise often starts quiet and grows louder. Recognizing the symptoms of a bad wheel bearing early helps you avoid a dangerous failure.
A humming noise from one corner of your vehicle points to a damaged assembly. The sound gets louder or softer as you turn the steering wheel. This happens because turning shifts weight from one side to the other.
Wheel bearing noise typically gets louder when you steer away from the bad side and quieter when you steer toward it, because turning shifts weight onto or off the damaged bearing.
You can use this fact to find the faulty side without special tools. Drive to an empty parking lot. Turn the wheel all the way left and drive in a slow circle. Listen for the noise. Then turn all the way right and drive another circle. If the noise gets louder turning left, the right side has the problem. If it gets louder turning right, the left side has the problem. This left/right load test is one of the most reliable low-cost diagnostic signals you can use.
A metal on metal grinding sound means severe damage. Do not drive far with this noise. The component can fail completely. A wheel bearing going bad makes itself known through these patterns.
Bad wheel hub bearings also create physical symptoms you can feel. You may notice wobbly steering or a vibration in the steering wheel. The vibration gets worse at higher speeds.
You can check for play in the hub. Lift the vehicle with a jack and support it on jack stands. Grab the tire at the top and bottom. Push and pull. Any movement means excessive play.
|
Measurement |
Value (inches) |
Value (mm) |
Description |
|---|---|---|---|
|
Factory acceptable play limit |
0.005 |
0.127 |
Maximum play allowed before replacement is typically recommended for regular cars. |
|
Excessive wobble threshold |
0.002 |
0.05 |
If hub wobbles more than this amount, immediate replacement is required per manufacturer guidelines. |
If the hub moves more than 0.005 inches (0.127 mm), you need a replacement. If it moves more than 0.002 inches (0.05 mm), the manufacturer requires immediate replacement. Listen for a grinding sound as you spin the wheel by hand.
Other symptoms include uneven tire wear and brake issues. Damage to the bearing can cause the ABS light to turn on. The sensor reads wheel speed incorrectly when the bearing wobbles.
Front bearings often fail first. They handle more weight and all steering forces. The symptoms of a bad wheel bearing on the front are usually louder and easier to detect.
The symptoms and causes of wheel hub failure go hand in hand. Recognizing all these signs early is the key. Bearings that fail left too long can damage the hub itself. A grinding sound that turns into a constant growl means advanced damage.
Causes of a Bad Wheel BearingThe most common reason a wheel hub bearing fails is impact damage. You hit a pothole, a curb, or some road debris. That sudden shock dents the raceway inside the bearing. Once the surface bends, the rollers no longer roll smoothly. The damage gets worse with every mile you drive.
Water and mud are the next big threats. Driving through deep puddles or flooded roads pushes water past the seals. Mud does the same thing. Once contamination gets inside, the grease breaks down fast.
If trailer hubs have been submerged in water, even briefly, the bearings should be repacked as soon as possible because water contamination is the fastest way to destroy bearings. Even when the water is shallow and no problem is noticed, moisture can enter, and rust can begin within hours.
A worn or torn seal makes this worse. The seal keeps grease in and water out. A cracked seal lets both jobs fail at once. Inspect the seal every time you have the hub apart.
Improper installation torque is one of the most common causes of failure. Too much or too little preload both destroy a bearing. The table below shows the specific torque errors and their effects.
|
Torque error |
Effect on wheel bearing |
Specific torque guidance |
|---|---|---|
|
Over-tightening adjustable tapered roller bearings |
Common error that can lead to premature failure |
Snug to no more than 15–20 ft-lbs while rotating the wheel; then loosen 1/6 to 1/4 turn and lock with a new cotter pin |
|
Too loose or too tight adjustment |
Can cause the bearing to fail prematurely |
Adjust end play to proper specifications; more than half of bearings on the road may be adjusted incorrectly |
|
Final tapered roller bearing adjustment |
Leaves zero end play and slight preload |
Torque initially to 15–20 ft-lbs, spin hub to center rollers, back off 1/8 or 1/4 turn, then retorque to manufacturer specifications; typical final torque 20–30 in-lbs |
High mileage wears out every bearing eventually. The grease ages, the surfaces pit, and play develops. A grinding noise at this stage means the hub failure is advanced. Catch it early to avoid a complete hub failure on the road.
Wheel Bearing Troubleshooting and Repair ProcessYou now know the signs and the causes. This section walks you through the actual wheel bearing troubleshooting and repair process. Follow these steps in order. Each one builds on the last.
Start with a road test. Drive on a quiet road at about 30 to 40 mph. Listen for the hum. Then find an empty parking lot and drive in a slow circle. Turn the wheel fully left. Note the noise level. Turn fully right. Note it again.
The side that gets louder when you turn away from it is the bad side. If the noise grows when you steer left, the right hub is failing. If it grows when you steer right, the left hub is failing. This happens because turning shifts the vehicle's weight onto the outer wheel. The loaded bearing makes more noise.
You can also swerve gently at speed. A bad wheel bearing will change pitch as the load moves. This test costs nothing and takes five minutes.
Lift the vehicle with a jack. Support it on jack stands. Grab the tire at the top and bottom. Push with one hand and pull with the other. Feel for any looseness. Movement means the hub has play and needs replacement.
Spin the wheel by hand next. Listen for a grinding or rumbling sound. A smooth bearing spins quietly. A worn one growls. You may also feel roughness through the tire as it turns.
A noisy bearing may last only a few hundred to a few thousand miles before it fails completely. In rare cases, a severe failure can lead to losing the wheel while driving. Replace it promptly.
Inspect the ABS sensor and its wiring. Look for damage or debris on the sensor tip. Scan the ABS module for codes. A wheel speed code on one corner often points to that hub. The sensor reads the tone ring on the hub. A wobbly hub gives a bad signal.
If you find play, noise, or an ABS code on one corner, you have confirmed the failure. Do not delay the repair. A bearing that howls today can seize tomorrow.
How to Replace a Wheel Bearing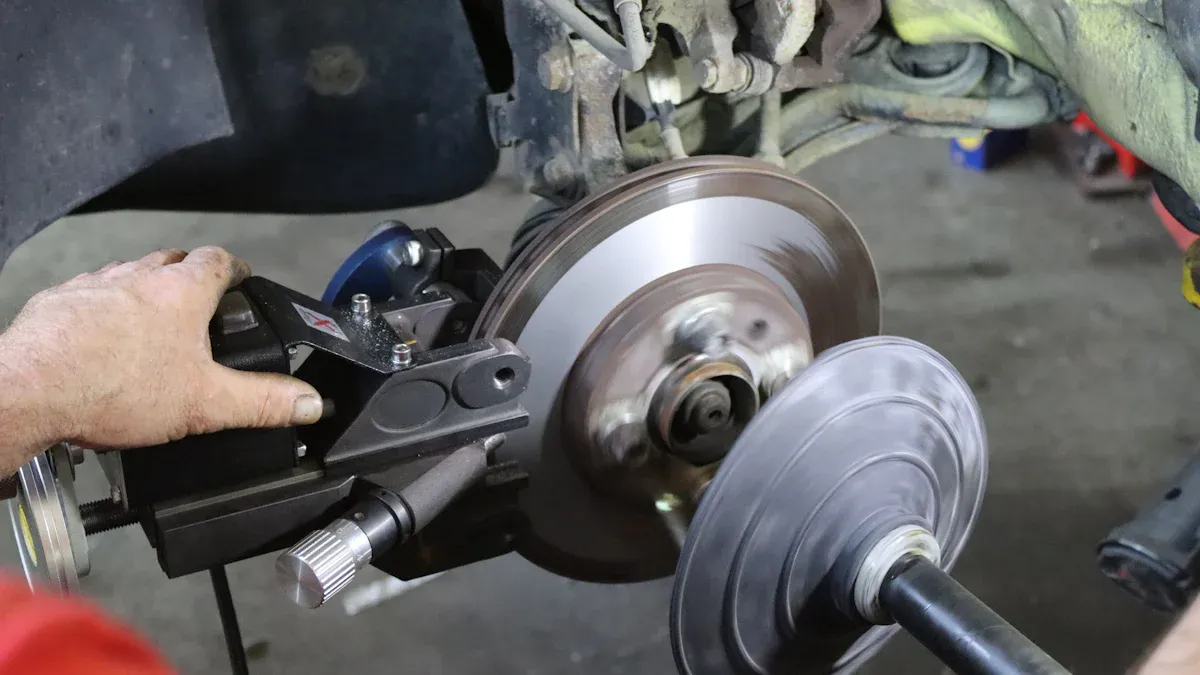
You have confirmed the failure. Now you can replace the part. The job differs based on your vehicle design. Some cars use a bolt-on hub assembly. Others use pressed-in bearings. Both methods are doable with basic tools and patience.
This design is the easier of the two. You swap the entire hub as one unit. Follow these steps:
Loosen the axle nut and lug nuts. Raise the vehicle and secure it on jack stands. Remove the wheel.
Remove the brake caliper and hang it aside. Do not let it dangle by the brake hose.
Remove the brake rotor. It may need a few taps with a rubber mallet.
Disconnect the ABS sensor wire from the hub.
Remove the hub mounting bolts. They are usually behind the steering knuckle.
Pull the old hub off. Clean the mating surface on the knuckle with a wire brush.
Install the new hub. Tighten the bolts in a star pattern to the manufacturer's torque spec.
Reinstall the rotor, caliper, and wheel. Torque the axle nut to spec with the vehicle on the ground.
This job requires a hydraulic press or a bearing press kit. You cannot hammer these in without risking damage. Follow these steps:
Remove the knuckle from the vehicle. This means disconnecting the tie rod, ball joint, and axle.
Mount the knuckle in a vise or press. Use the correct sized adapters.
Press the old bearing out of the knuckle. Support the knuckle properly to avoid cracking it.
Clean the bore thoroughly. Any rust or debris will cause the new bearing to seat crooked.
Press the new bearing in. Apply force only to the outer race. Never press on the inner race.
Reinstall the knuckle and reconnect all components. Torque every fastener to spec.
Correct torque matters for both designs. Too little torque lets the hub move. Too much crushes the bearing. Always use a calibrated torque wrench. Clean mating surfaces prevent uneven seating. That uneven load leads to early failure.
Inspect your wheel bearings during routine service. Catching play or noise early saves you from a roadside breakdown. A little attention now prevents a big repair later.
Replacement Tips and Quality PartsGather your tools before you start. You need a jack and jack stands to lift the vehicle safely. A socket set and a breaker bar help you remove tight bolts. A torque wrench is not optional. It is the most important tool for this job.
Hubs can be picky about their torque. Too loose and you have a loose tire up and down causing driveability issues, with wheel bearing failure to follow. Too tight and premature wheel bearing failure due to overstress or overheating. You have about a 30ish ft.lb margin of error where you are safe. A cheap torque wrench with plus or minus 4% accuracy is more than good enough for this task. One driver tightened a hub to 150 ft.lbs and the wheel hardly moved. He backed it off to 142 and it was smooth. That 8 ft.lb difference matters.
For pressed-in bearings, you also need a bearing press or a hub puller. Never hammer a bearing into place. You will damage the races and cause early failure.
Buy bearings from reputable brands. Cheap parts often fail again within a few thousand miles. The small savings now cost you another full replacement later.
Before you install any new wheel hub, inspect three root causes of repeat failure:
Fatigue and overloading — repeated heavy loads or aggressive driving can crack or warp the flange.
Improper installation or torque — wrong torque sequence causes uneven stress and early wear.
Corrosion and environmental damage — road salt and water weaken the flange and lead to pitting.
Fix the root cause, not just the bearing. If you ignore a bent flange or a worn seal, the new hub will fail too. Check the axle flange for cracks or warping. Replace worn seals. Clean all mating surfaces. A quiet, smooth ride comes from doing the whole job right.
Most wheel bearing problems start with impact damage, water intrusion, or a bad installation. The bearing itself is often the victim, not the cause. You can diagnose the issue with a simple road test, a play check, and an ABS scan. Replacement is straightforward when you use quality parts and correct torque.
Fix the root cause to prevent repeat hub failure. Check the axle flange, replace worn seals, and clean every mating surface. A worn hub will destroy a new wheel hub fast. You have the steps. A quiet, smooth ride is one weekend job away.
FAQThe left/right load test works best. Drive in a slow circle turning fully left, then right. The noise grows when you steer away from the bad side. A louder hum during left turns points to a failing right bearing.
A noisy bearing may last only a few hundred to a few thousand miles before it fails completely. Severe failure can even cause wheel loss. Replace it promptly.
A bolt-on hub swaps as one complete unit. A pressed-in bearing requires a hydraulic press to remove and install the bearing into the steering knuckle. Check your vehicle design before starting.
Repeat failure often comes from ignoring the root cause. Impact damage, water intrusion, improper installation torque, or a worn seal destroy a new bearing fast. Fix the root cause first.
Please leave your requirements and contact information, and we will send you the quotation information as soon as possible.