Date: 2026.06.18 Click: 60
You can change a wheel speed sensor by yourself with simple tools and some patience. Many drivers see problems like ABS lights that stay on or strange brake actions. These problems can happen because of broken wires, rusty connections, or dirt blocking the sensor. If you drive a common truck like a Ford F-Series or Chevrolet Silverado, you may see this problem more. Not fixing a bad sensor can be dangerous and may cost you more money later. Be careful, stay safe, and always look at your car’s guide for the right steps.
Key TakeawaysYou can change a wheel speed sensor with simple tools like a socket set, jack, and torque wrench. Get all your tools ready before you start. This helps the job go smoothly.
Safety is very important. Park your car on a flat spot. Use jack stands to hold up the car. Wear gloves and eye protection to keep safe from harm.
Watch for signs of a bad sensor. The ABS light may stay on. The brake pedal might shake. Fix these problems soon to keep driving safe.
Follow each step when you put in the new sensor. Clean the spot first. Put in the new sensor tightly. Check all the connections again to stop future trouble.
If the ABS light is still on after you finish, check the wires and connections. Sometimes, you need to drive a short distance to reset the system.
You don’t need fancy equipment to replace a wheel speed sensor. Most jobs only require basic hand tools and a safe place to work. Here’s what you should gather before you start:
Socket Set & Wrenches: You’ll need a metric socket set, usually between 8mm and 14mm, to remove the sensor’s mounting bolt.
Jack & Jack Stands: These help you lift your vehicle and keep it steady while you work. Never rely on just a jack.
Penetrating Oil: This loosens rusty bolts and makes removal easier.
Brake Cleaner & Rag: Clean the area around the sensor before installing the new one.
Torque Wrench: Tighten bolts to the manufacturer’s specs so nothing comes loose later.
You might also want to have a flashlight, gloves, and a wheel chock for extra safety. When you pick a replacement sensor, you’ll see OEM brands like Denso cost more, sometimes up to $300. Many drivers choose aftermarket sensors, which cost less—usually between $50 and $200. These work well for most vehicles and help you save money.
Safety matters most. You want to avoid injuries and protect your car. Start by parking on a flat surface. Set the parking brake and use wheel chocks to keep your vehicle from rolling. Always use jack stands after lifting your car. Don’t trust the jack alone.
Tip: Wear gloves and eye protection. You’ll deal with dirt, rust, and chemicals.
Keep your workspace clean and organized. Lay out your tools so you don’t trip or lose anything. If you’re working outside, make sure the weather is dry. Take your time and double-check each step. If you feel unsure, check your vehicle’s guide or ask for help. You can do this safely with patience and the right setup.
Diagnosing the Faulty Wheel Speed Sensor
You might wonder how you can tell if your anti-lock brake sensor is going bad. Your car will usually give you some clear signs. Here are the most common symptoms you should watch for:
The abs light comes on and stays on while you drive.
You feel the brake pedal pulsing or vibrating when you press it.
The anti-lock brakes stop working, so your wheels might lock up during hard braking.
You notice your traction or stability control systems do not work right.
If you see the abs light or feel any of these problems, you should check your sensors soon. Ignoring these signs can make driving unsafe.
You can find out which sensor is causing trouble with a few simple steps. Start with a visual check. Look at each sensor and its wiring near the wheels. Dirt, rust, or broken wires can cause problems. If you see anything damaged, that sensor might be the problem.
For a more accurate check, you can use a scan tool. Many auto parts stores will let you borrow one. Here’s how abs wheel speed sensor diagnostics usually go:
Plug the scan tool into your car’s OBD-II port.
Read the error codes. The tool will tell you which wheel has a problem.
Use the live data feature to watch the wheel speed readings. If one sensor shows a different speed or no reading, you’ve found the faulty one.
You can also test the sensor with a multimeter. Check the resistance or power supply if you want to be sure. If you’re not comfortable with these steps, ask a friend or a mechanic for help.
Wheel Speed Sensor Replacement StepsBefore you start, make sure you have the right part. Double-check that your replacement speed sensor matches your vehicle’s make and model. If you need to replace the front right speed sensor, confirm the part number. This step helps you avoid headaches later.
Here’s how you get your car ready:
Park on a flat, solid surface.
Set the parking brake and use wheel chocks behind the tires.
Disconnect the battery. This keeps you safe from electrical shocks and stops the ABS system from turning on by accident.
Gather your tools. You’ll need a socket set, wrenches, screwdrivers, pliers, and a torque wrench. Have cleaning supplies ready to wipe away dirt and rust.
Put on safety glasses and gloves. These protect your eyes and hands from debris and sharp edges.
Lift your car with a jack and secure it with jack stands. Never work under a car supported only by a jack.
Tip: Don’t disconnect brake lines or drain brake fluid unless your vehicle’s guide says so. If you need to bleed the ABS system, follow the right steps to keep air out of the brakes.
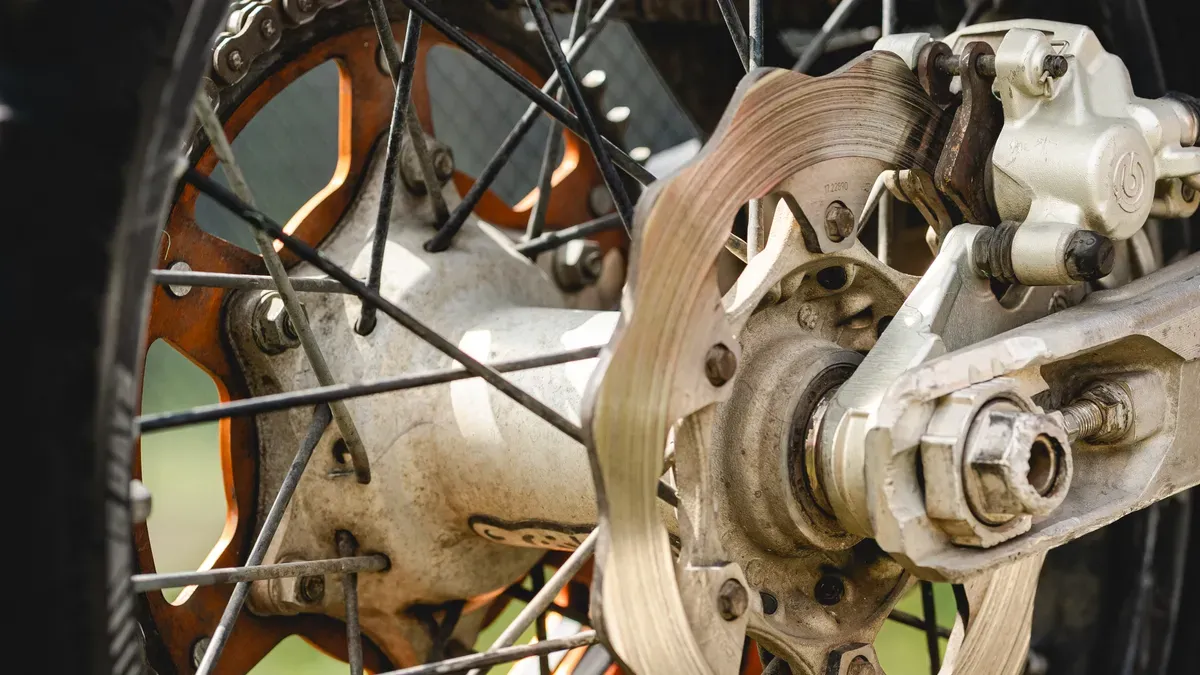
Now you’re ready to get to the wheel speed sensor. Start by removing the wheel. If you’re working on the front right speed sensor, take off the front right wheel. Sometimes, you may need to remove the brake caliper and rotor to reach the sensor. Check your car’s manual to see if this is needed.
If you see rust or the sensor looks stuck, spray a little penetrating oil on the mounting bolt. Wait a few minutes. This makes it easier to loosen.
Find the sensor’s electrical connector. Most connectors have a locking tab or clip. Press the tab and gently pull the connector apart. Don’t yank on the wires. This can break the connection inside. If you need to remove any clips or ties, keep them safe for reassembly.
Unscrew the sensor’s mounting bolt with your socket set. Pull the old sensor out. Sometimes, dirt or rust makes it hard to remove. Wiggle it gently if needed.
Note: Take a picture of the sensor’s wiring path before you remove it. This helps you route the new sensor the same way.
Clean the sensor mounting hole with a rag or a little brake cleaner. Dirt or rust can stop the replacement speed sensor from sitting flat. Make sure the area is dry before you continue.
Slide the new sensor into place. If you’re installing a front right speed sensor, check that it lines up just like the old one. Tighten the mounting bolt with your torque wrench. Use the torque value from your car’s manual. Some cars need a thread locking compound on the bolt. Check your guide to be sure.
Plug in the sensor’s connector. Line it up with the harness and push until you hear a click. The locking tab should snap into place. Route the wiring along the same path as before. Use the clips or ties you saved earlier.
Make sure the sensor sits straight and does not touch any moving parts.
Set the air gap if your manual gives a measurement. This helps the sensor read wheel speed correctly.
Double-check that the connector is clean and fully seated.
Tip: Never use a test light or regular circuit tester on ABS wires. These tools can damage the sensor or the ABS module.
Put the brake rotor and caliper back if you removed them. Reinstall the wheel and tighten the lug nuts. Lower the car off the jack stands.
Reconnect the battery. Now it’s time to test your work.
Visual Check: Look at the wiring for the front right speed sensor and the replacement speed sensor. Make sure there are no loose wires or broken clips.
Clear Codes: If you have a scan tool, clear any ABS codes. This resets the system.
Road Test: Start the car and drive slowly in a safe area. Watch for the ABS light. It should turn off after a few seconds. Try braking gently and then a little harder. The ABS should work smoothly.
Check Again: If the ABS light stays on, double-check your connections and the sensor’s position. Sometimes, a dirty or misaligned sensor can cause problems.
If you replaced the front right speed sensor and the ABS light is still on, use a scan tool to check for new codes. Sometimes, the system needs a few minutes of driving to reset.
You’ve now finished the job. With patience and careful steps, you can replace a wheel speed sensor and get your ABS system working again.
Troubleshooting and TipsYou just finished your repair, but the abs light still glows on your dashboard. This can feel frustrating. Don’t worry—many drivers run into this problem. Here are some common reasons the abs light stays on after you replace a wheel speed sensor:
Corrosion in the sensor connector or wiring, especially near the suspension.
Damage to the sensor or its wires from road debris or past repairs.
Cracked, rusted, or dirty tone rings that block the sensor from reading wheel speed.
Worn bearings or hubs that change the gap between the sensor and the tone ring.
Internal sensor failure from age, heat, or impact.
Incorrect wheel bearing installation, which can confuse the sensor.
Rodent damage to the sensor wire, which you can often see.
If you want to fix the abs light, try these steps:
Check the sensor connection. Make sure the wiring harness clicks into place.
Inspect the wiring for cracks, chafing, or melted spots.
Double-check the part number to make sure you used the right sensor.
Look at the tone ring for missing teeth or heavy rust.
Scan the ABS system for trouble codes and compare live data from each sensor.
Tip: Sometimes, the system needs a short drive to reset the abs light after a repair.
You want your repair to last. Here are mistakes you should watch out for:
Forgetting to secure the vehicle with jack stands.
Pulling on wires instead of connectors, which can break them.
Mixing up the sensor’s wiring path.
Not cleaning the mounting area before installing the new sensor.
Ignoring the torque specs for bolts.
Skipping a scan tool check after the job.
Take your time and double-check each step. Careful work helps you avoid repeat repairs and keeps your ABS system working right.
You’ve learned how to swap out a wheel speed sensor step by step. Double-check your work before you drive. Take your car for a careful test drive and watch for warning lights. Most people can handle this repair with patience and attention to detail. If you still see problems or feel unsure, you have options:
Some issues need special tools or expert help.
Complex or safety-related problems call for a professional mechanic.
Stay safe and enjoy the confidence of fixing your own car!
FAQYou can finish the job in about 30 to 60 minutes. If you run into rust or stuck bolts, you might need extra time. Take it slow and double-check your work.
Most cars reset the ABS light after you drive for a few minutes. If the light stays on, use a scan tool to clear the codes. You can borrow one from an auto parts store.
You can drive, but your ABS and traction control won’t work right. This makes your car less safe, especially in wet or icy conditions. Fix the sensor as soon as you can.
You need a socket set, jack, jack stands, torque wrench, and penetrating oil. Gloves and safety glasses help protect you. A scan tool makes diagnosing easier.
Most aftermarket sensors work fine for daily driving. If you want the best fit and reliability, choose an OEM sensor. Check reviews and make sure the part matches your car.
Please leave your requirements and contact information, and we will send you the quotation information as soon as possible.
